Saw this in the archives of the Project Tuesday page and thought it would be fun to try. It wasn't as hard as I thought it would be. The splendor paper really made my cloudy day shine! Used: Goldrush, Moonstruck and Splendor papers, Moonstruck and Topiary Inks, vines from One of a Kind stamp set and bird stamp from Felicity set. Directions here.
Friday, May 21, 2010
Tuesday, May 18, 2010
Shirt Fold Instructions
I've had some requests on how to fold the shirt on the card I did. Well, I took some pictures and this is what I came up with. Besides, I don't think you would have understood "fold left thingie over to the other side to the other thingie..." Hope this helps! You can click on pictures to make them bigger.
1. Start with a 4x6 piece of paper. (you could go 5x7 or 3x5, but that ratio works best, I think.)
2. Lightly crease top in half, just to get a half way point for the next step - DO NOT fold all the way.
3. Fold both sides into middle (to that light fold mark at top)
4. Fold over top (towards unopened side) about 1/2 inch (this is your collar).
5. Turn over and fold top corners in, leaving a space at the top (collar) with points together.
6. Fold up bottom, tuck under the "collar" and make crease at bottom of shirt.
7. Unfold again
8. Fold out "sleeves" from crease to the bottom of paper, like shown.
9. Fold back up. Voila! You have a shirt. You can pierce holes and add brads as buttons if you wish!
Friday, May 14, 2010
May Stamp-a-palooza!
Our new babies!!
Tuesday, May 4, 2010
Altered Tin
OPEN HOUSE
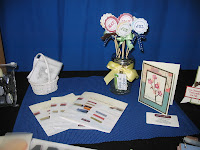
Well, if you missed it - you missed some fun! I had a two day open house and had the chance to see so many of my new friends - and make some new ones! Thanks to all of you who came out and saw the new product, made a card and played the game! A special congrats to the door prize winners! We made this cute card as the make-n-take (sorry about the BAD picture)!
My Mom is the BEST!
My mom's birthday was May 2 and I wanted to make her something special. I saw the rose on Jeanette Lynton's blog and had to try it. I don't however, recommend trying it at 10:30 at night....She loved the card, which is all that mattered! LOVE YOU MOM!
used: caprice ctmh paper
Subscribe to:
Posts (Atom)